The SlideGeeks BlogAll About PowerPoint, Presentations & Life
Learn To Create The Paint Brush Effect In PowerPoint
PowerPoint is a powerful tool. If used properly it can turn your boring presentation slides into something dynamic and out of the world. But how?
You must be thinking that PowerPoint does not have artistic tools like Photoshop does, so how is this possible? Well, we have a cure with an artistic touch and that is the one and only Paint Brush Effect.
A paint brush effect?
Yes, you read it right!
Sometimes the simplest of the designs can really turn your slide around. It can make it a huge success. Even though PowerPoint lacks paint brushes per se but the exact effect can be achieved in it with a few simple steps.
In this tutorial, you will discover the secret of achieving a paint brush effect in PowerPoint to add that creative appeal to your presentation that it might be lacking!
What you will learn to create in this tutorial:
Step #1- Download and Install a font
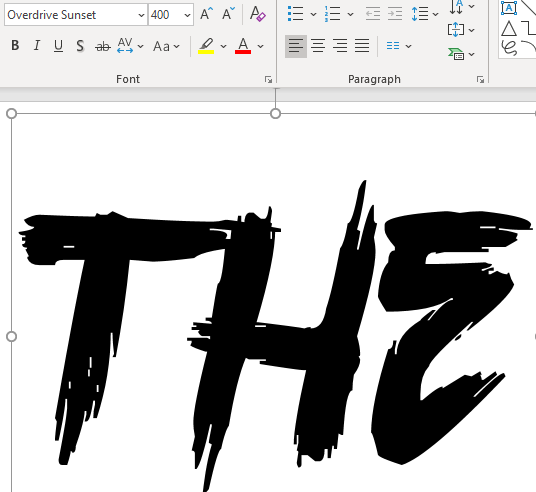
Since PowerPoint has no inbuilt brush tools, we will be downloading and installing a brush font. There are hundreds of brush fonts available, however, not all of them are suitable to be used while creating such an effect. We have selected Overdrive Sunset font which very closely represents a bush font. You can use a font of your choice, but we would recommend you to download Overdrive Sunset as it is the best to achieve a paint brush effect. To do so:
- Download the free font
- Install it on your system and open it in PowerPoint.
- Insert a text box in your slide and type “THE”
- Go to Home and change the font to Overdrive Sunset
- Increase the font size to as many pts as you like ( we have chosen 400)
Step #2- Turn “The” into an object
Next step involves changing “The” into an object so that it can be filled with an image later on. To do so:
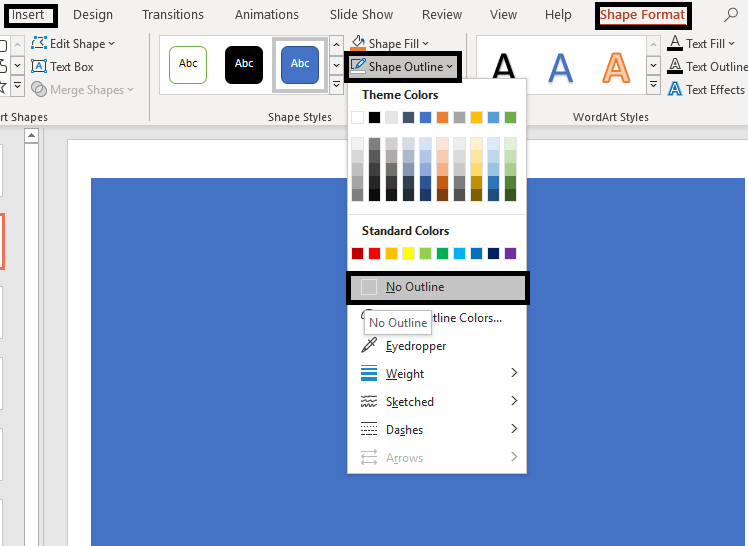
- Insert a rectangular shape by clicking on Insert> Shapes> Rectangle
- Place this rectangle over “THE”
- Click on the rectangle and select Shape Format> Shape Outline> No Outline
- Go to the Shape Format tab on the PowerPoint ribbon
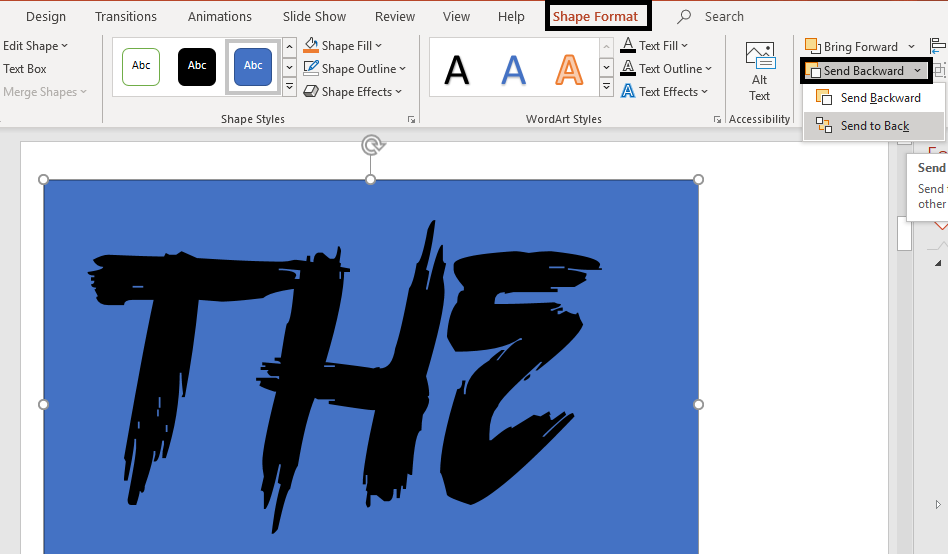
- Select the rectangle and click on Send Backward> Send to Back option from the dialog box
- Now select both the rectangle and the text by pressing on CNT + A command
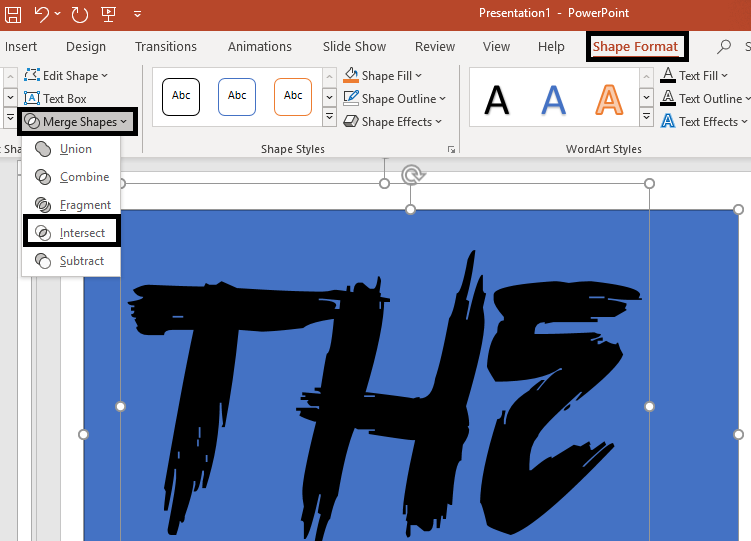
- Go to Shape Format tab and select Merge Shapes
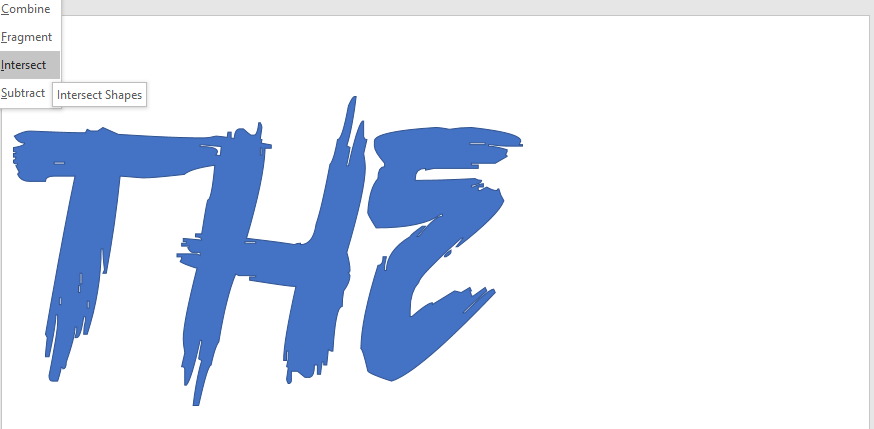
- A dropdown menu will appear from which select the Intersect option
Your text is now converted into an object as shown in the screenshot below:
Step #3 Duplicate and place the objects to create a single object
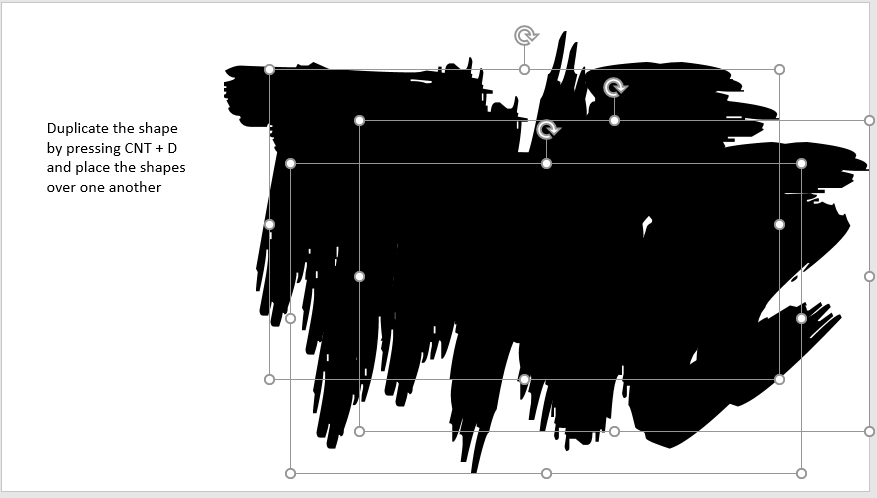
Select the object and duplicate it using CNT + D. Duplicate it multiple times and place it in such a way that it appears like a single object as shown in the screenshot below: You can also rotate these shapes to create objects of different shapes and sizes.
Next, select all the shapes by clicking on CNT + A command. Once all the shapes are selected:
- Go to Shape Format and select Merge Shapes
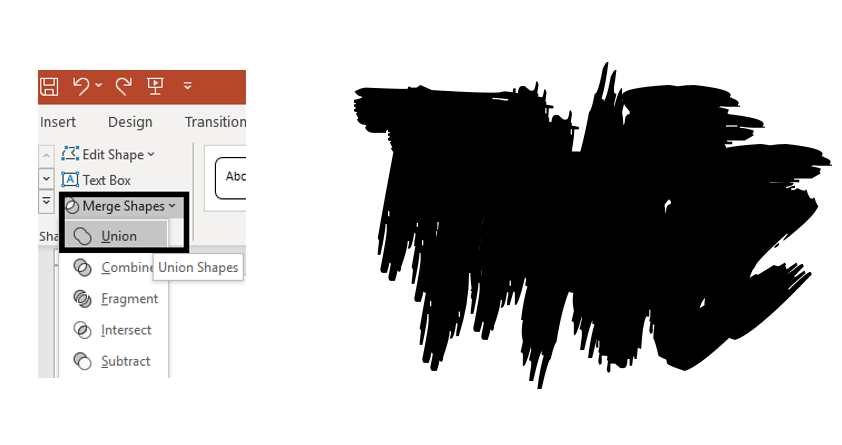
- From the dropdown menu select the Union option
The basic paint brush shape is now ready!
It is now time to fill it with an image of your choice.
Step #4- Insert an Image using Picture or Texture Fill
The last step is to fill your shape with an image. To do this:
- Right click on the shape and select Format Shape
- A format shape dialog box opens towards the right hand side
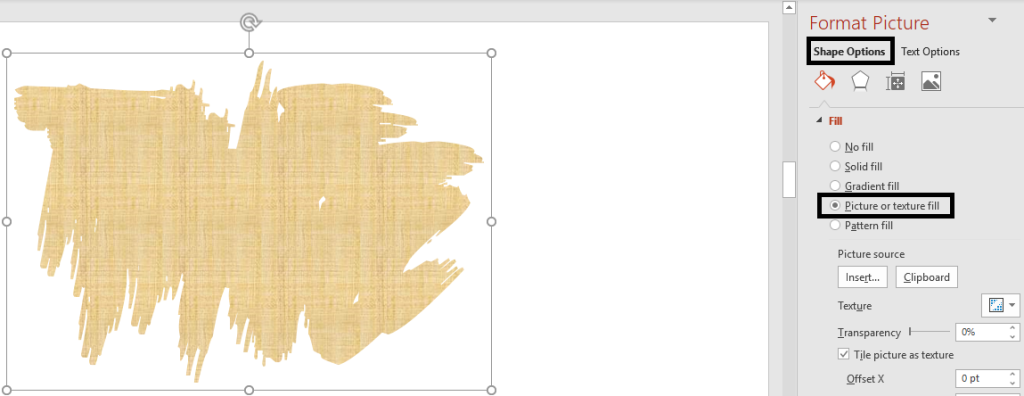
- Select Picture or Texture Fill radio button
- Click on Insert. Your shape will be filled with the default texture as shown in the screenshot below:
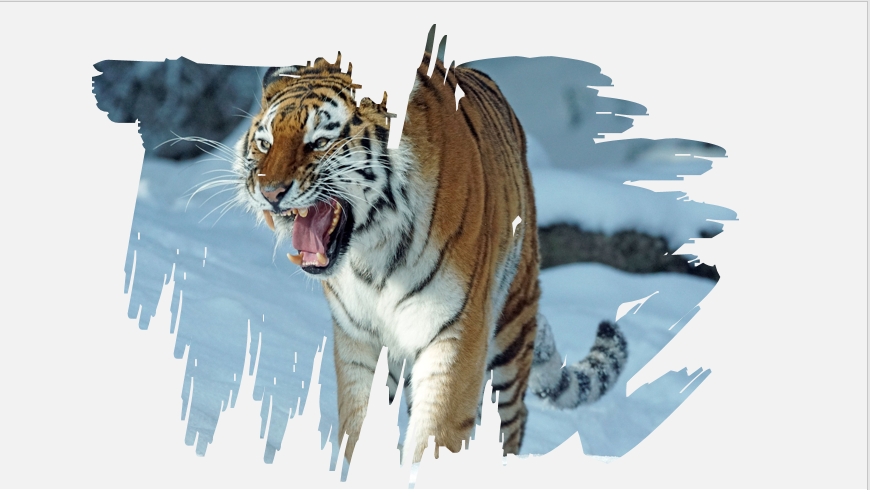
To add an image, select the Insert option and choose a file of your choice. Here we have added an image of a tiger in the shape for your reference.
You can now adjust the size of the image or rotate it to give your desired effect.
Now, add your text next to the image to complete the slide.
This is how your final slide will look like:
Have fun with this one and create amazing slides. All the best!


